

本文介绍了在 WIN10 环境下关于 hexo 博客的配置,并以 yilia 主题为例示范了如何更换主题,并且介绍了分别把本地的博客部署到远方的 github 与 阿里云 等服务器上的方式。
一、博客本地部署
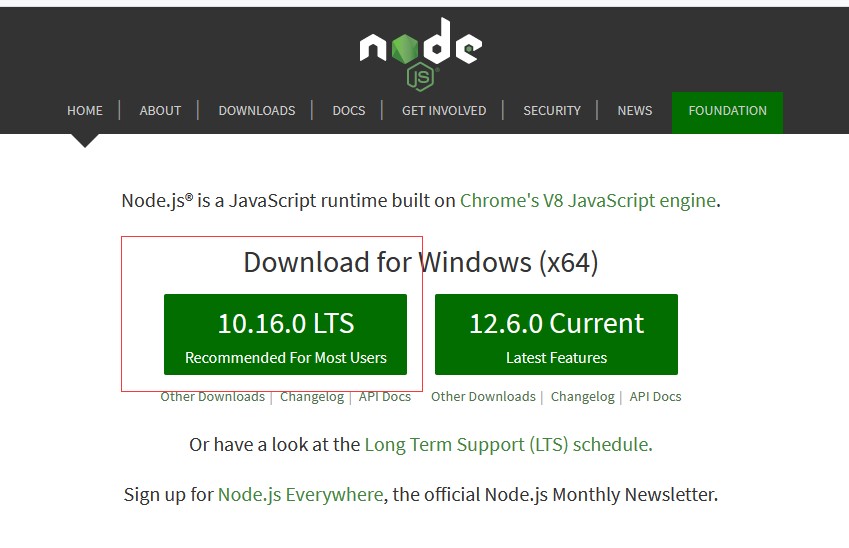
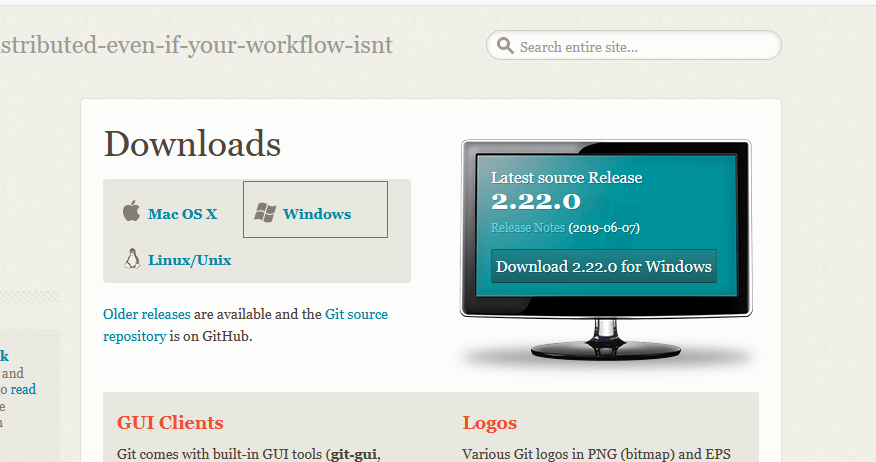
需要安装的插件——Node.js与Git
- Node.js 官网:https://nodejs.org/en/
Git 参考网址: https://www.cnblogs.com/ximiaomiao/p/7140456.html
右击任意空白位置进入 git

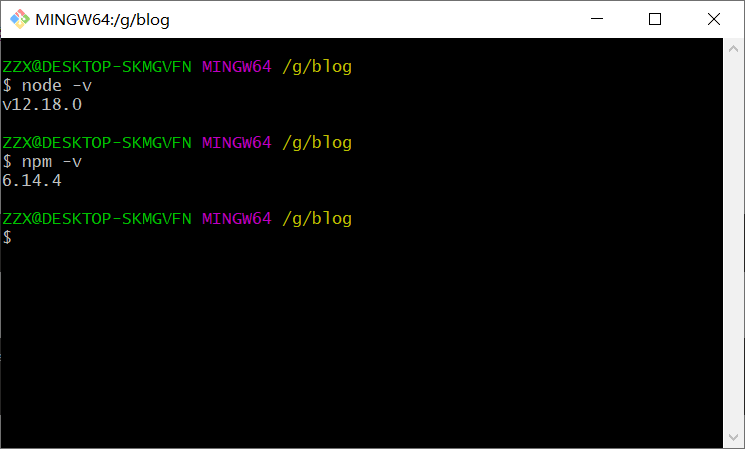
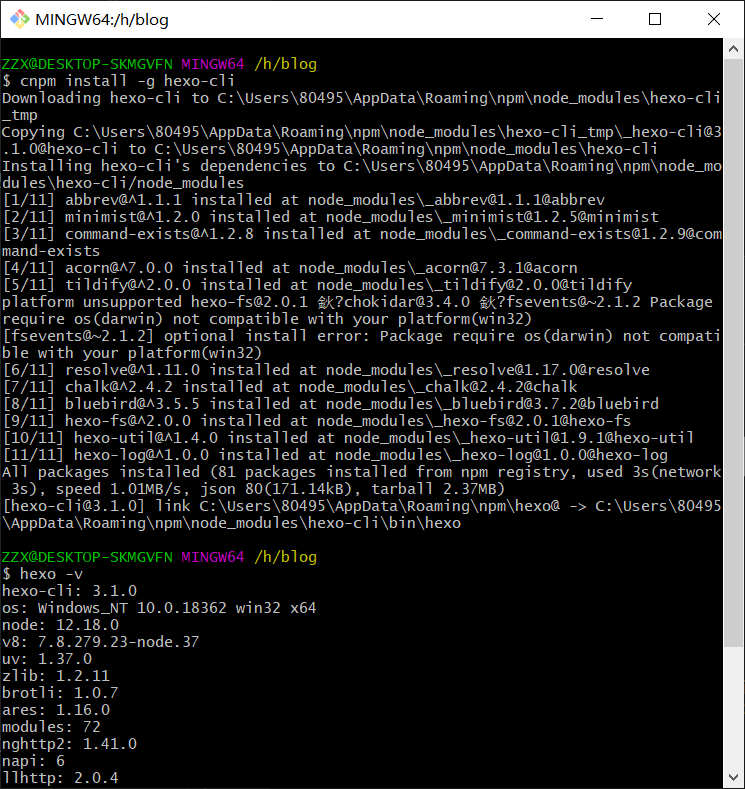
检测 node 安装是否成功:
1
2
node -v #若能返回 node 的版本信息,代表安装成功
npm -v #若能返回 npm 的版本信息,代表安装成功
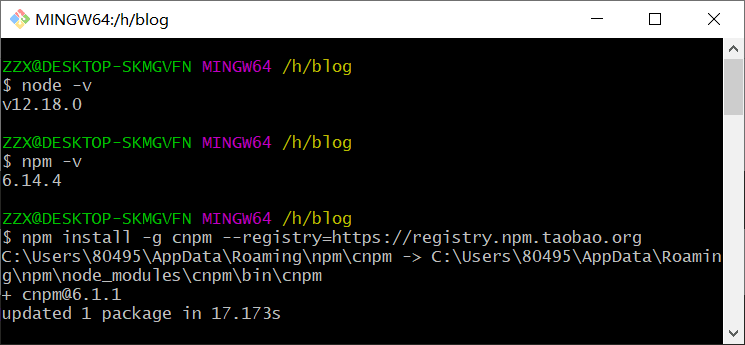
- 安装淘宝的镜像源(国内为了安装快捷)
1 | npm install -g cnpm --registry=https://registry.npm.taobao.org |
- 安装hexo ;如果失败重新来过就可以了
1 | cnpm install -g hexo-cli |
1 | mkdir blog #在自定义目录下建立文件夹 blog |
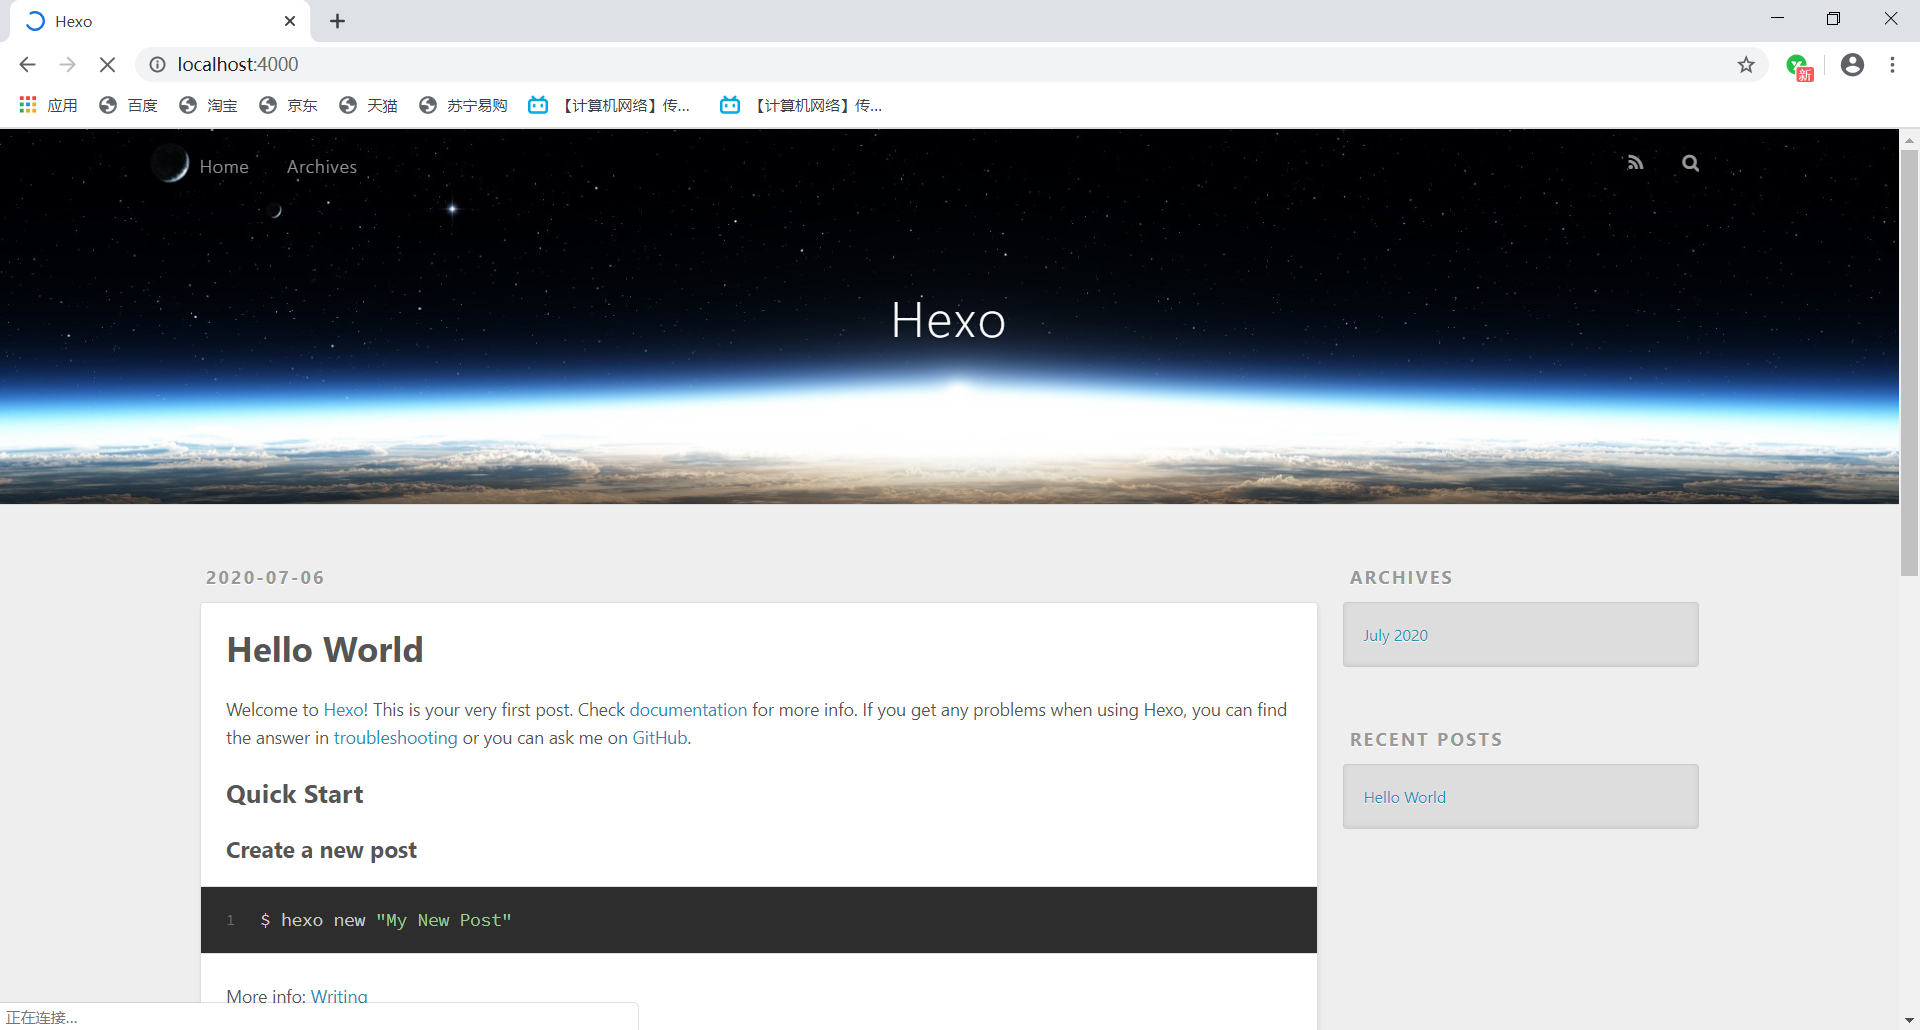
- 进入 http://localhost:4000 即可预览
二、深化操作1(更换hexo博客主题——以yilia主题为例)
- 首先,克隆 yilia 主题
1 | git clone https://github.com/litten/hexo-theme-yilia.git themes/yilia |
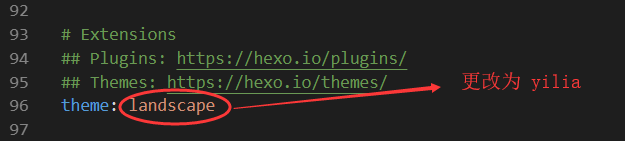
- 然后,进行部署,找到blog文件中的(注意不是 yilia 下的)
_config.yml文件,使用 Visual Studio Code 编译器打开,找到这部分代码(即 theme )将冒号后面的内容改为刚刚新建的 yilia 。
1 | hexo clean #清除数据库之类 |
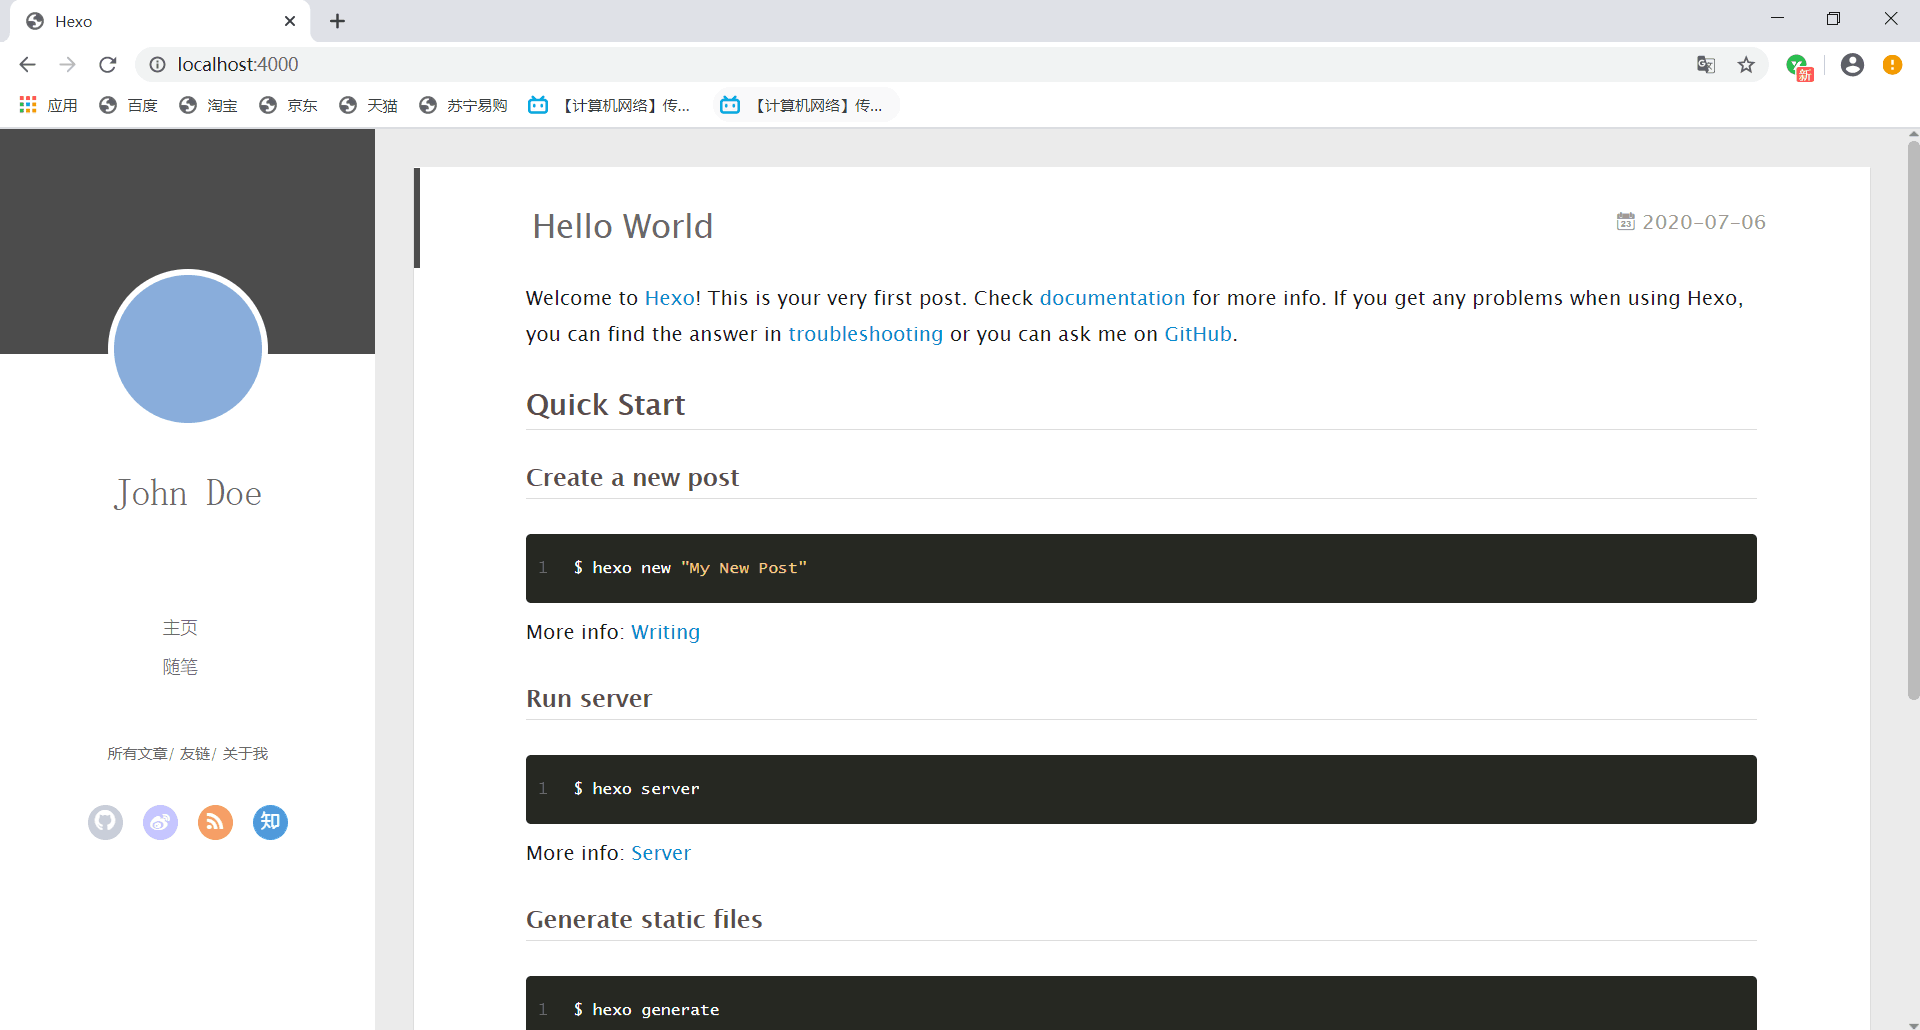
- 最后,这样就实现了主题的更改
三、深化操作2(将博客部署到GitHub上)
- 首先,在 blog 目录下安装一个hexo部署插件:
1
cnpm install --save hexo-deployer-git
- 然后,找到 blog 文件中的
_config.yml文件,在末尾找到并修改以下部分:
1 | type #一个名字,建议写成git方便识别 |
1 | hexo d #将本地文件部署到github新建的仓库中 |
- 最后,通过访问
https://+自己的仓库名就可以访问部署到 github 上的 blog 了
(例:https://gavinzhenxing.github.io/)
四、深化操作3(将博客部署至阿里云服务器并冠以域名)
1. 安装nginx
安装ngin需要相关的依赖库,我们先进行库的安装。尝试过直接用命令yum install nginx 会把 nginx 安装在其他位置,不方便管理,因此我们要一步一步来。
1 | # 安装依赖库 |

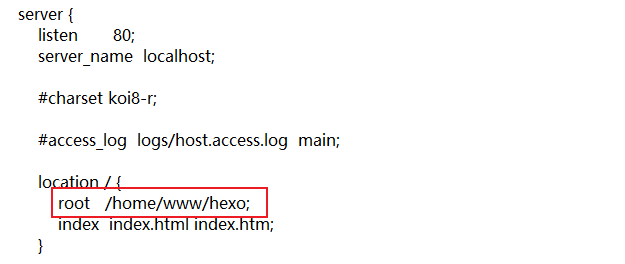
修改配置文件/usr/local/nginx/conf/nginx.conf的root项 为/home/www/hexo;
2. 配置远程仓库
1 | # 安装Git |
可以显示版本号即为成功

1 | adduser git |
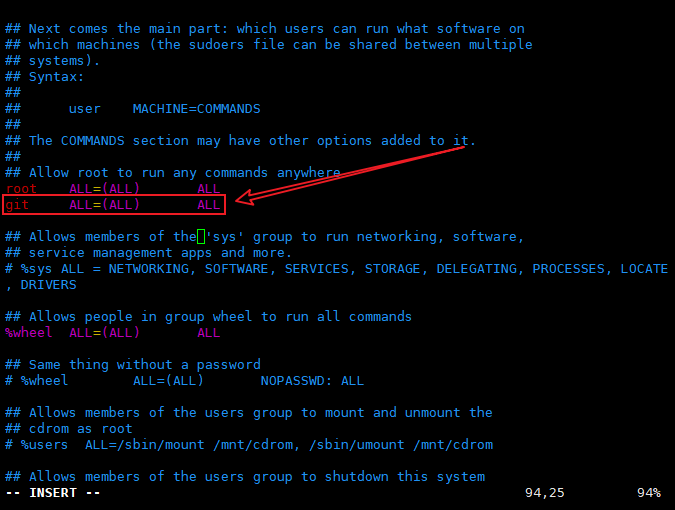
1 | #执行以下指令更改文件夹权限 |
在本地电脑 ssh 测试一下
ssh git@服务器的公网ip
可以连接到即成功
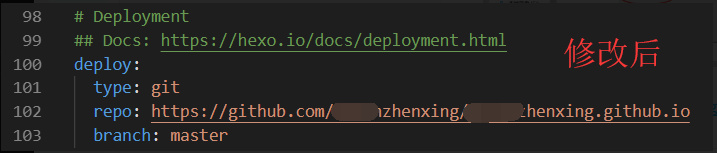
修改本地 本地/blog/_config.yml

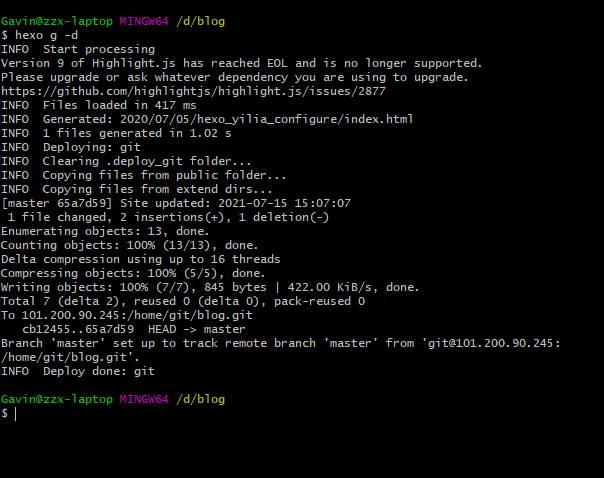
此时在本地终端里通过hexo g -d 命令发布,浏览器中输入 公网ip 就可以查看到博客内容

3. SSL证书问题
SSL 证书是干嘛的呢?
- 我们都知道网页有两种开头
http://和https://,他们的区别就是不安全/安全,或者说没证书/有证书。申请证书的前提: 已经购买了域名,因为证书是域名的证书,所以要先有自己的域名。
如果没有证书会出现如下情况,倒是也可以继续访问,就是左上角永远有一个“不安全”,让人不舒服:
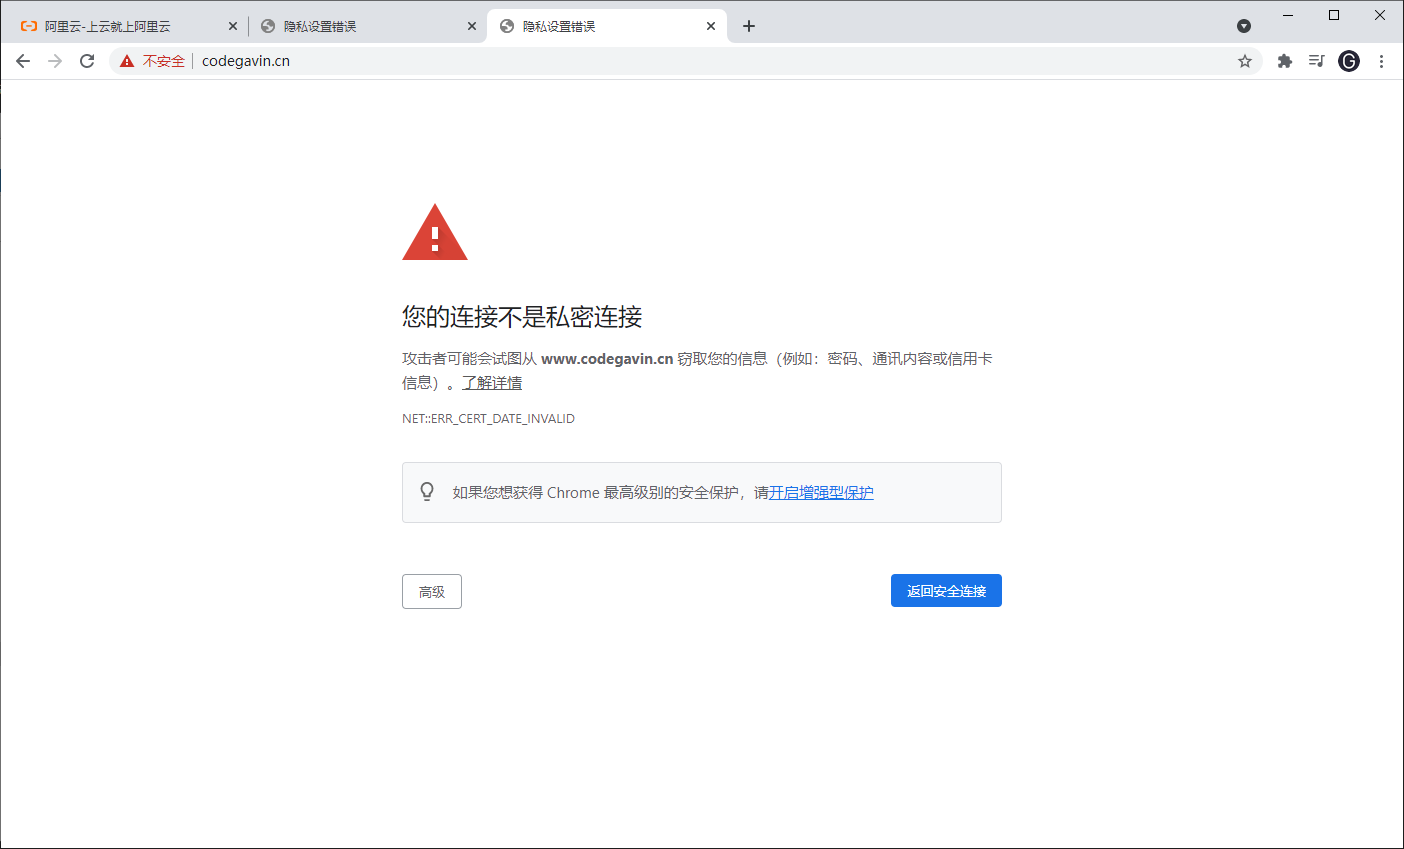
解决办法: 去阿里云申请一个免费 SSL 证书,再加载到 nginx 的配置文件中即可。
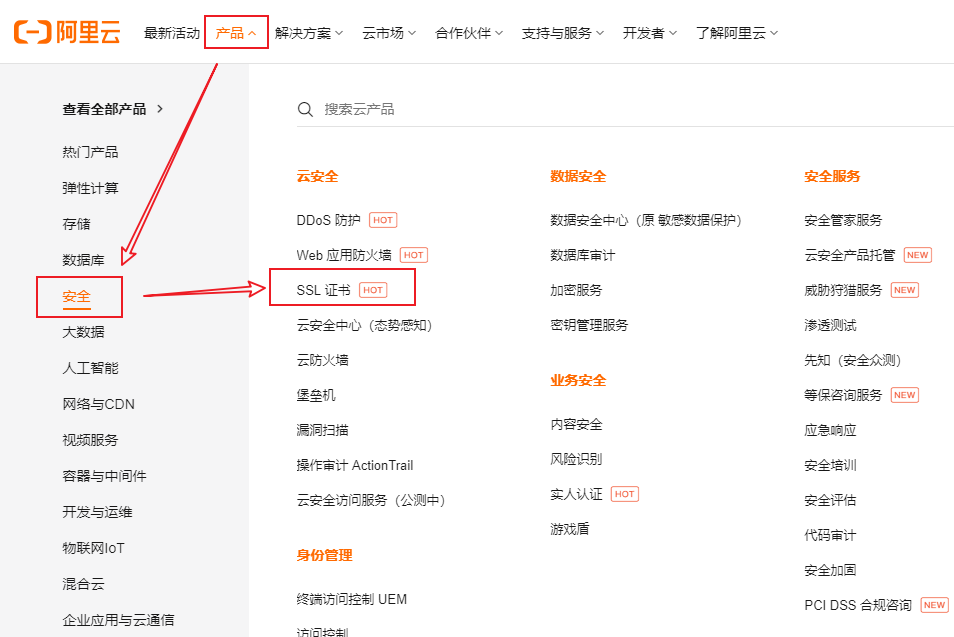
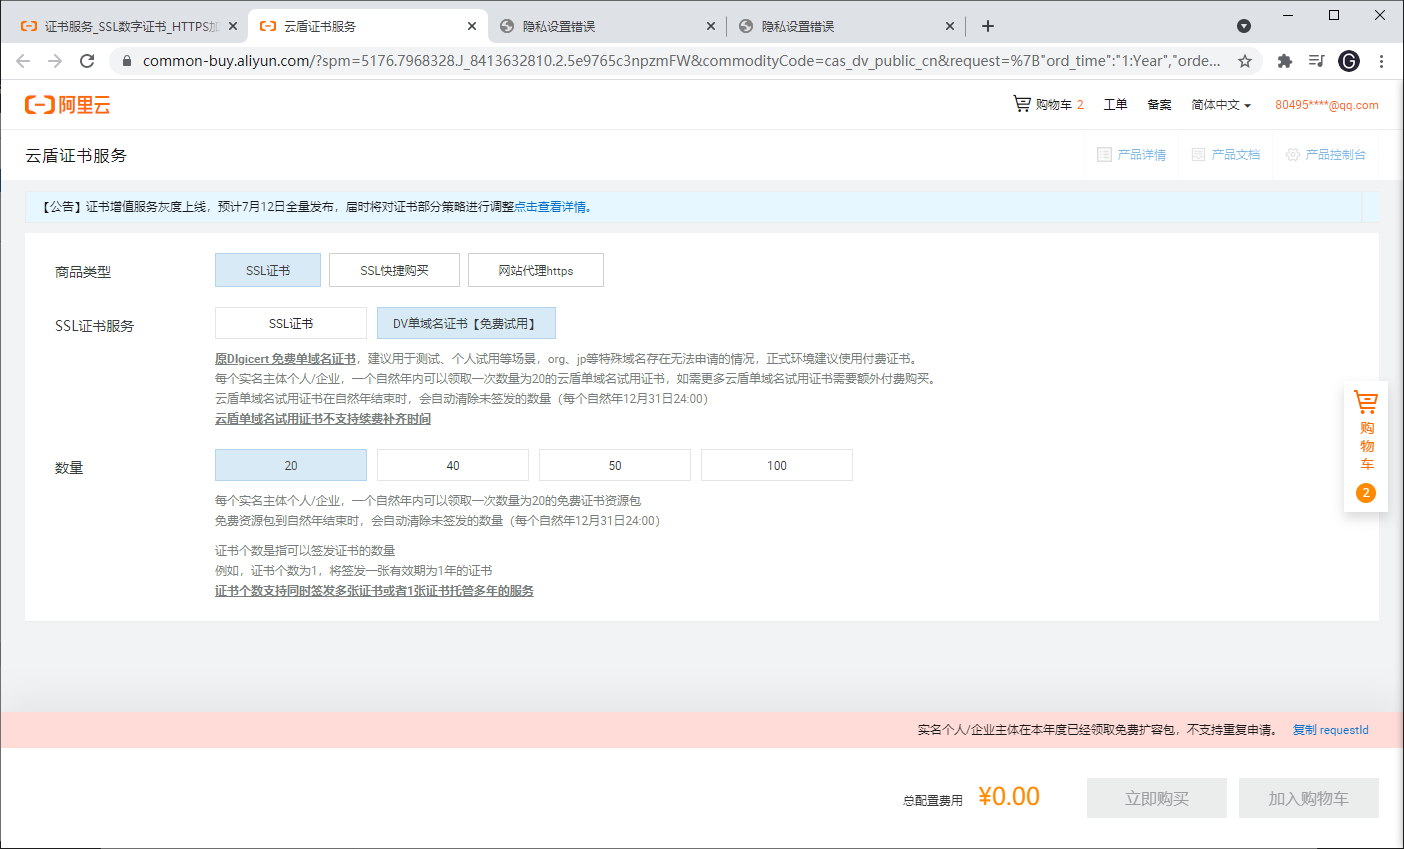
申请证书方法:
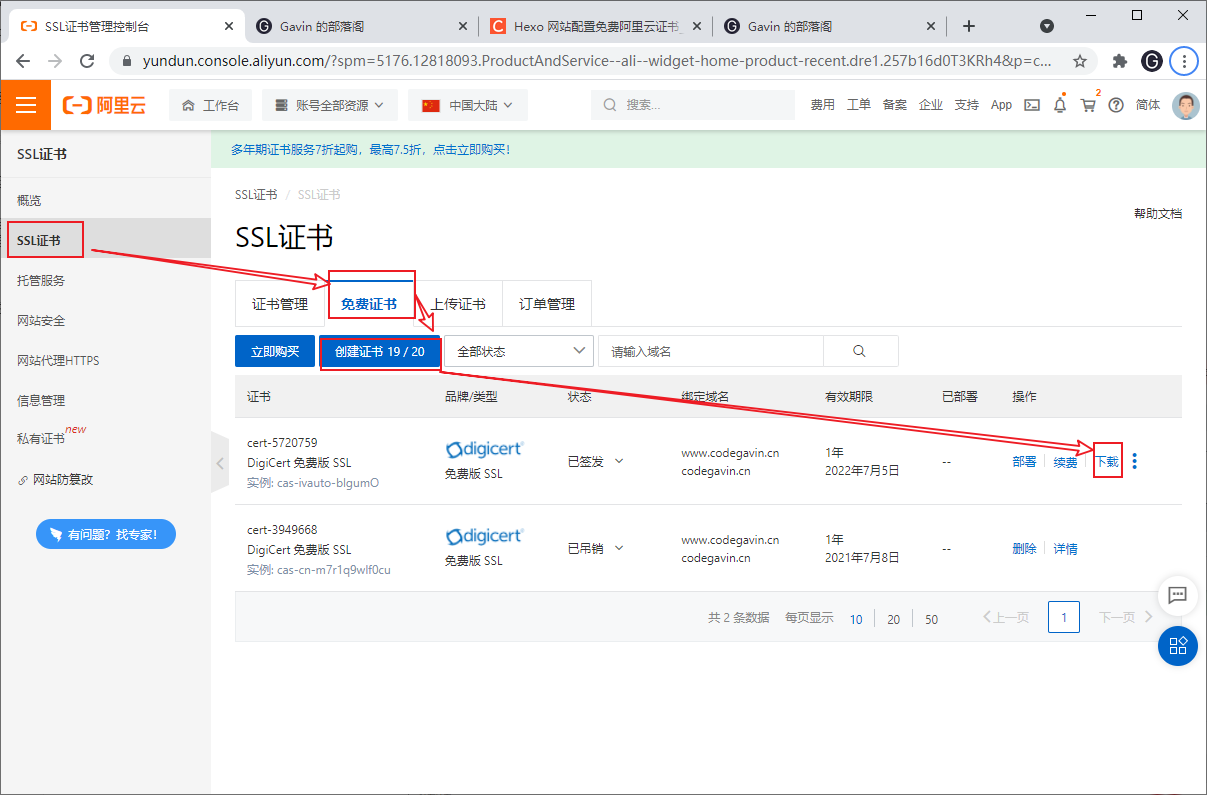

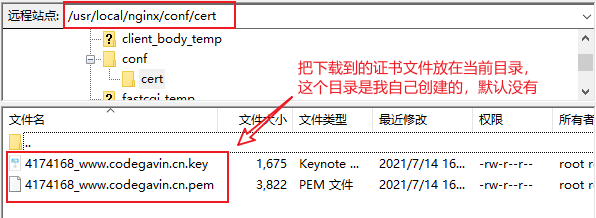
- 证书存放路径:
/usr/local/nginx/conf/cert
- Nginx配置:
/usr/local/nginx/conf/nginx.conf
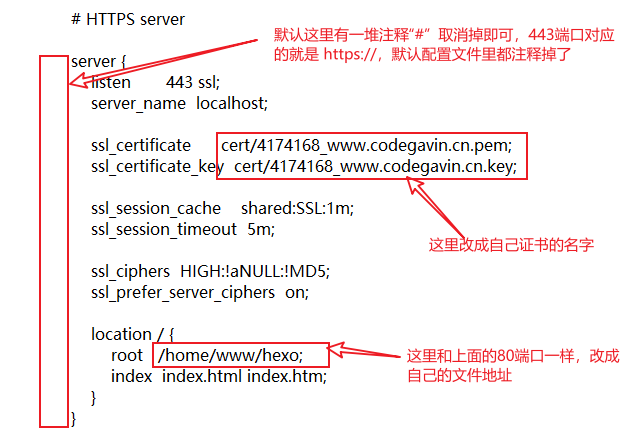
- 修改了配置文件后我们要开启nginx 的 ssl 功能
1 | # 先关闭 nginx |

- 此时我们可以正常访问
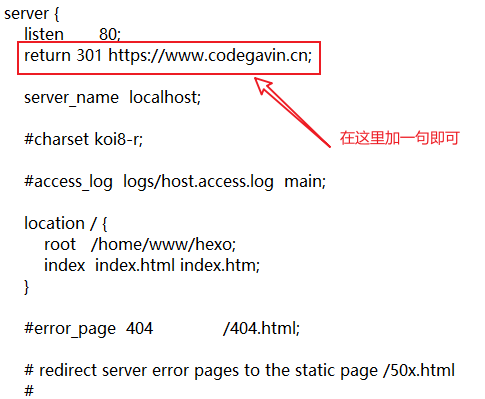
https://域名,但是也可访问http://域名,如果直接输入域名,浏览器有时会直接跳转到http://域名,让新用户还是看到了不安全,所以我们要屏蔽掉http://。 - 具体的做法就是在
/usr/local/nginx/conf/nginx.conf设置80端口的地方加一句return 301 https://域名,如下图
- 再次重启 nginx 服务:
/usr/local/nginx/sbin/nginx -s reload或者service nginx reload - 完成~
六、文章补充:安装过程中的坑(按照安装先后顺序)
在3.6:如果之前主机(本地端)使用过 ssh 功能,那么应该删除本地的
C:\Users\80495\.ssh下的known_hosts文件。在4.1:如果之前有过把博客部署到github或者其他地方,那么,在所有步骤进行完成之后记得删除本地博客目录
\blog下的.deploy_git文件夹,这样可以解决hexo d后仍然网页403错误。在 4.1 进行完之后,使用
hexo d可能会出现许多个warning: LF will be replaced by CRLF in提示。原因:在windows下面提交和 linux 提交的换行符不一样,windows 中的换行符为CRLF,而在 linux 下的换行符为LF,在 windows 下直接回车就会出现这个提示,修改的办法是把core.autocrlf设置成false。解决办法:git config --global core.autocrlf false在 4.2 域名解析操作完成后,可能会出现报错:
nginx: [emerg] the "ssl" parameter requires ngx_http_ssl_module in /usr/local/nginx/conf/nginx.conf:,
这个是安装nginx的时候没有开启ssl功能,此时解决办法如下:
a. 查看是否开启ssl模块:
/usr/local/nginx/sbin/nginx -Vb. 正常开启应返回以下内容:
1
2
3
4
5nginx version: nginx/1.10.1
built by gcc 4.8.5 20150623 (Red Hat 4.8.5-39) (GCC)
built with OpenSSL 1.0.2k-fips 26 Jan 2017
TLS SNI support enabled
configure arguments: --prefix=/usr/local/nginx --with-http_stub_status_module --with-http_ssl_modulec. 没有开启最后一行
configure arguments:后应为空d. 重要:先关闭 ngxin ! 关闭nginx命令:
/usr/local/nginx/sbin/nginx -s stope. 开启 ssl 模块:找到你安装的源码包(不是 /usr/local/nginx)是那个带有版本号的位置。也就是你安装解压之后的文件,我这里是
cd /usr/local/nginx-1.10.1f. 执行命令:
./configure --prefix=/usr/local/nginx --with-http_stub_status_module --with-http_ssl_moduleg. 执行命令:
makeh. 然后备份原有已安装好的nginx:
cp /usr/local/nginx/sbin/nginx/usr/local/nginx/sbin/nginx.baki. 然后将刚刚编译好的 nginx 覆盖掉原有的nginx:
cp ./objs/nginx /usr/local/nginx/sbin/j. 启动 nginx:
/usr/local/nginx/sbin/nginxk. 查看安装:
/usr/local/nginx/sbin/nginx -V
Nginx 控制命令不方便
在
/etc/init.d/路径下添加脚本文件,名称为nginx,内容如下1
2
3
4
5
6
7
8
9
10
11
12
13
14
15
16
17
18
19
20
21
22
23
24
25
26
27
28
29
30
31
32
33
#Startup script for the nginx Web Server
#chkconfig: 2345 85 15
nginx=/usr/local/nginx/sbin/nginx
conf=/usr/local/nginx/conf/nginx.conf
case $1 in
start)
echo -n "Starting Nginx"
$nginx -c $conf
echo " done."
;;
stop)
echo -n "Stopping Nginx"
killall -9 nginx
echo " done."
;;
test)
$nginx -t -c $conf
echo "Success."
;;
reload)
echo -n "Reloading Nginx"
ps auxww | grep nginx | grep master | awk '{print $2}' | xargs kill -HUP
echo " done."
;;
restart)
$nginx -s reload
echo "reload done."
;;
*)
echo "Usage: $0 {start|restart|reload|stop|test|show}"
;;
esac然后执行
chmod +x nginx现在想要控制 Nginx
1
2
3
4
5
6
7
8#启动
service nginx start
#停止
service nginx stop
#重启
service nginx reload- 更改备案
如果换了服务器,记得也要把域名的
*解析,解析到对应位置yilia的备案代码位置\themes\yilia\layout\_partial\footer.ejs的
参考文献
bilibili-CodeSheep-手把手教你从0开始搭建自己的个人博客 |无坑版视频教程| hexo
bilibili-CoolPlayer-函博-一步一步教你如何在Windows10上完成hexo博客搭建和yilia主题使用
blog-如何将博客部署到云服务器
